
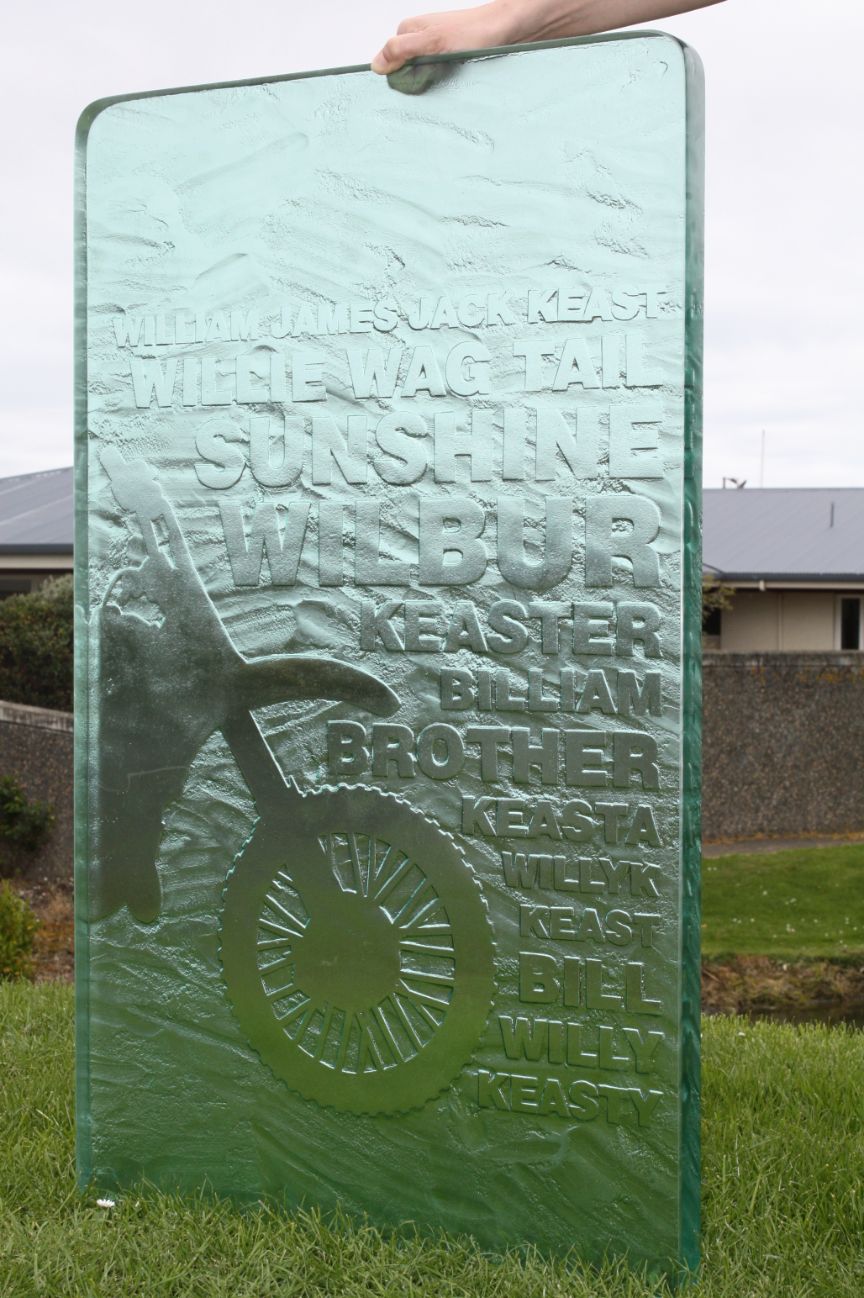
It is recommended that a certified installer is used when and wherever possible, this may likely be a requirement from your local council, please check before you proceed.
Things you will need:
Concrete foundation
Rubber pads (3-4 @ roughly 40mm x 50mm
Glass headstone Silicone
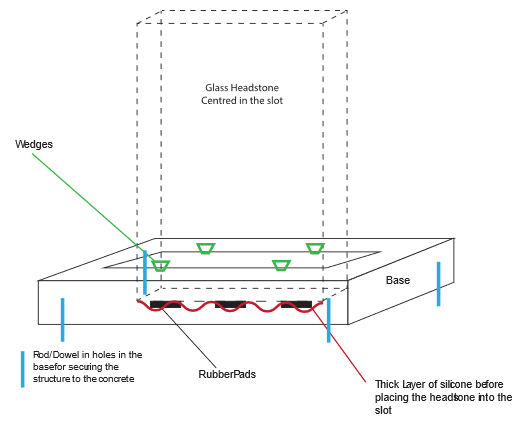
Desired Base with slot for glass Wedges x4
Spirit level
Step one -
Clear the area of any leaves and debris. If the base needs attached to a concrete foundation please head to step two, if this is not necessary please proceed to step three.
Step two -
Pour the concrete foundation. All Headstones need a concrete foundation/fringe. This concrete foundation needs to be the same measurements as the base (minimum) or larger (preferred). It also needs to be level and done to council & Monumental Association standards.
Step three -
Position the base in the desired location. This will then need set in place on the concrete foundation with 4 x Dowels.
Step four -
Place the 3 to 4 rubber pads, at least 4mm – 5mm thick, in the bottom of the slot in the base. This is to stop the headstone sitting directly on to the concrete foundation. Cover in a thick layer of silicone. This layer will be the main fixing for the glass.
Step four -
Insert the glass into the slot and centre. There should be an even clearance around all sides. Please measure to ensure the headstone is centred in the slot. Fill the surrounding sides with more silicone. Leave room at the top to allow for the wedges.
Step five
- Secure with the wedges until the silicone is dried (2 wedges front and back should be sufficient) leave a clear area free from silicone around these wedges so you can remove them – this should be in place for at least 72 hours. If the weather is cold please leave longer.
Step six -
Remove the wedges and fill these remaining gaps with more silicone to fully seal around the glass.
If you need to talk you through the process please just give Carey a call anytime on 0272230190
Delivery or Installation
Design yourself
24/7 Support
Sustainable materials
Pricing Guide
What You’ll Need:
24 Hours fine weather days
A concrete or granite surface for mounting
BOSTIK® V60 Neutral Cure Silicone Sealant – Translucent
Silicone applicator (caulking gun)
Masking Tape & pencil for marking
Cleaning liquid (Methylated spirits, rubbing alcohol or window cleaner
Before You Begin:
Clean the Surface Thoroughly clean the area where the plaque will be installed using methylated spirits, rubbing alcohol, or a quality window cleaner. This ensures proper adhesion.
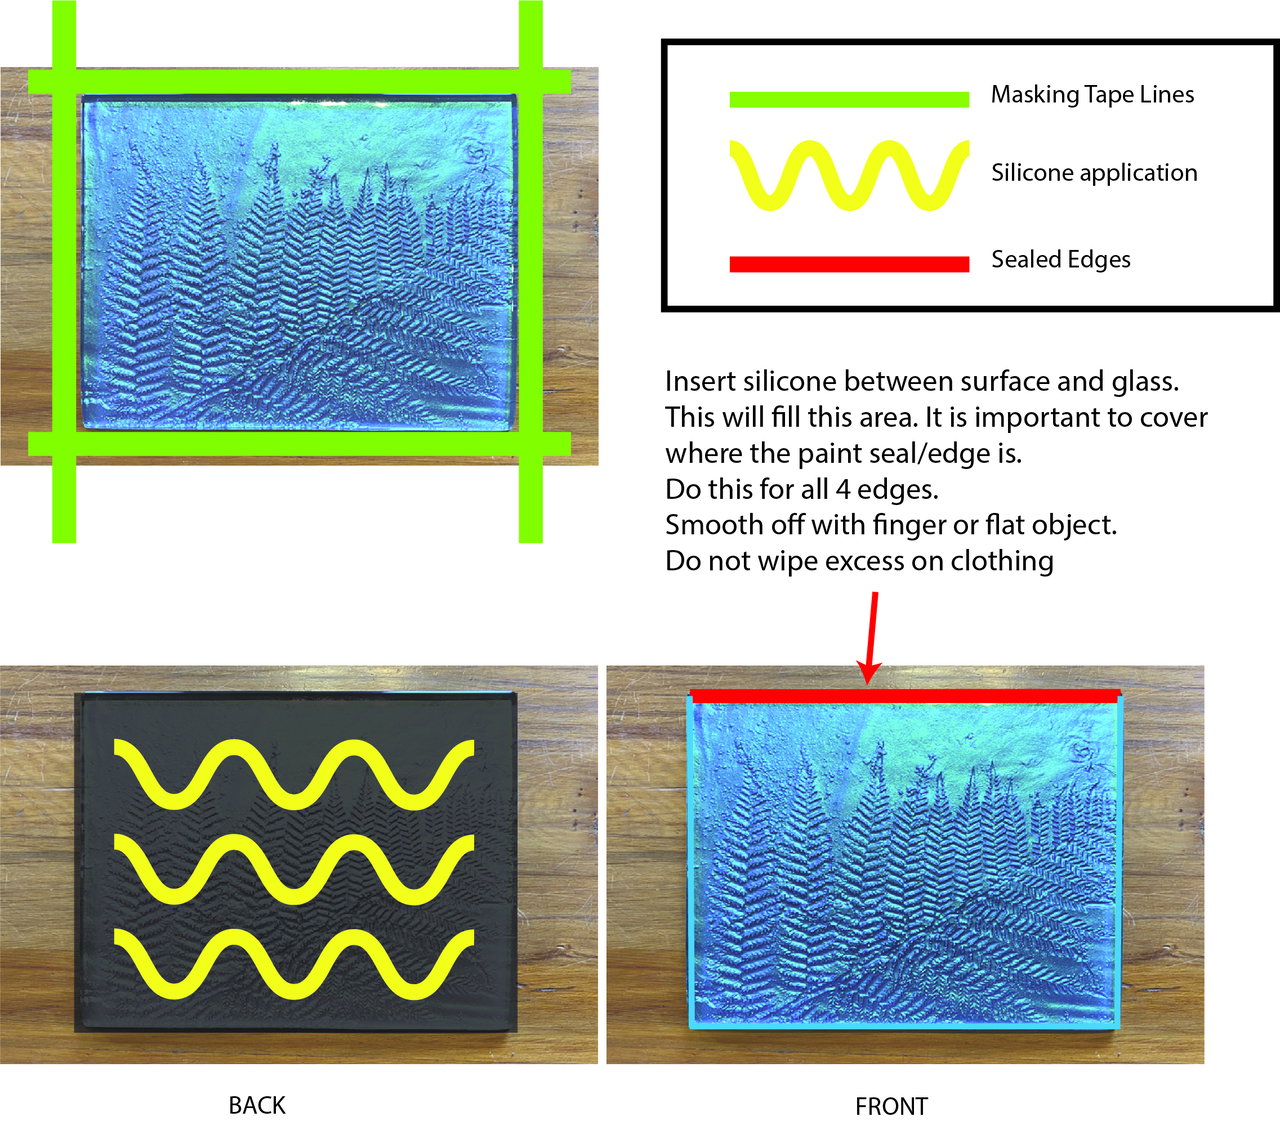
Mark the Position Use a pencil and masking tape to outline the exact spot where you want the plaque to be mounted.
Test the Placement Temporarily position the plaque within your marked area to confirm accuracy before applying adhesive.
Recommended Installation Method: Silicone Adhesion
Note: Due to the natural shape of slumped glass, plaque backs may not be completely flat. Silicone adhesive is ideal for this type of installation because it offers strong, flexible bonding and allows time for adjustments before setting.
Step-by-Step Instructions:
Apply Silicone Apply squiggly lines of V60 Neutral Cure Silicone on the back of the plaque.
Mount the Plaque Press the plaque firmly into place within your taped outline.
Secure with Tape Use masking tape to hold the plaque in place while the silicone begins to set. Leave it for at least 30 minutes.
Seal the Edges After 30 minutes, run a thin bead of silicone around the plaque’s edges to seal it completely. A thorough seal will ensure the longevity and appearance of your plaque.
Tip for a Smooth Finish: With your chosen cleaning liquid. Dip your finger in it and gently run it along the silicone bead with minimal pressure to smooth it out evenly. Note: Silicone likes to stain things easily – so avoid wiping your hands on your clothing.